Currently Active
🔥 Active Events
🐦 Bird City — Active
🌸 Lush Blooms — Active
Game World
🗺️ All Maps
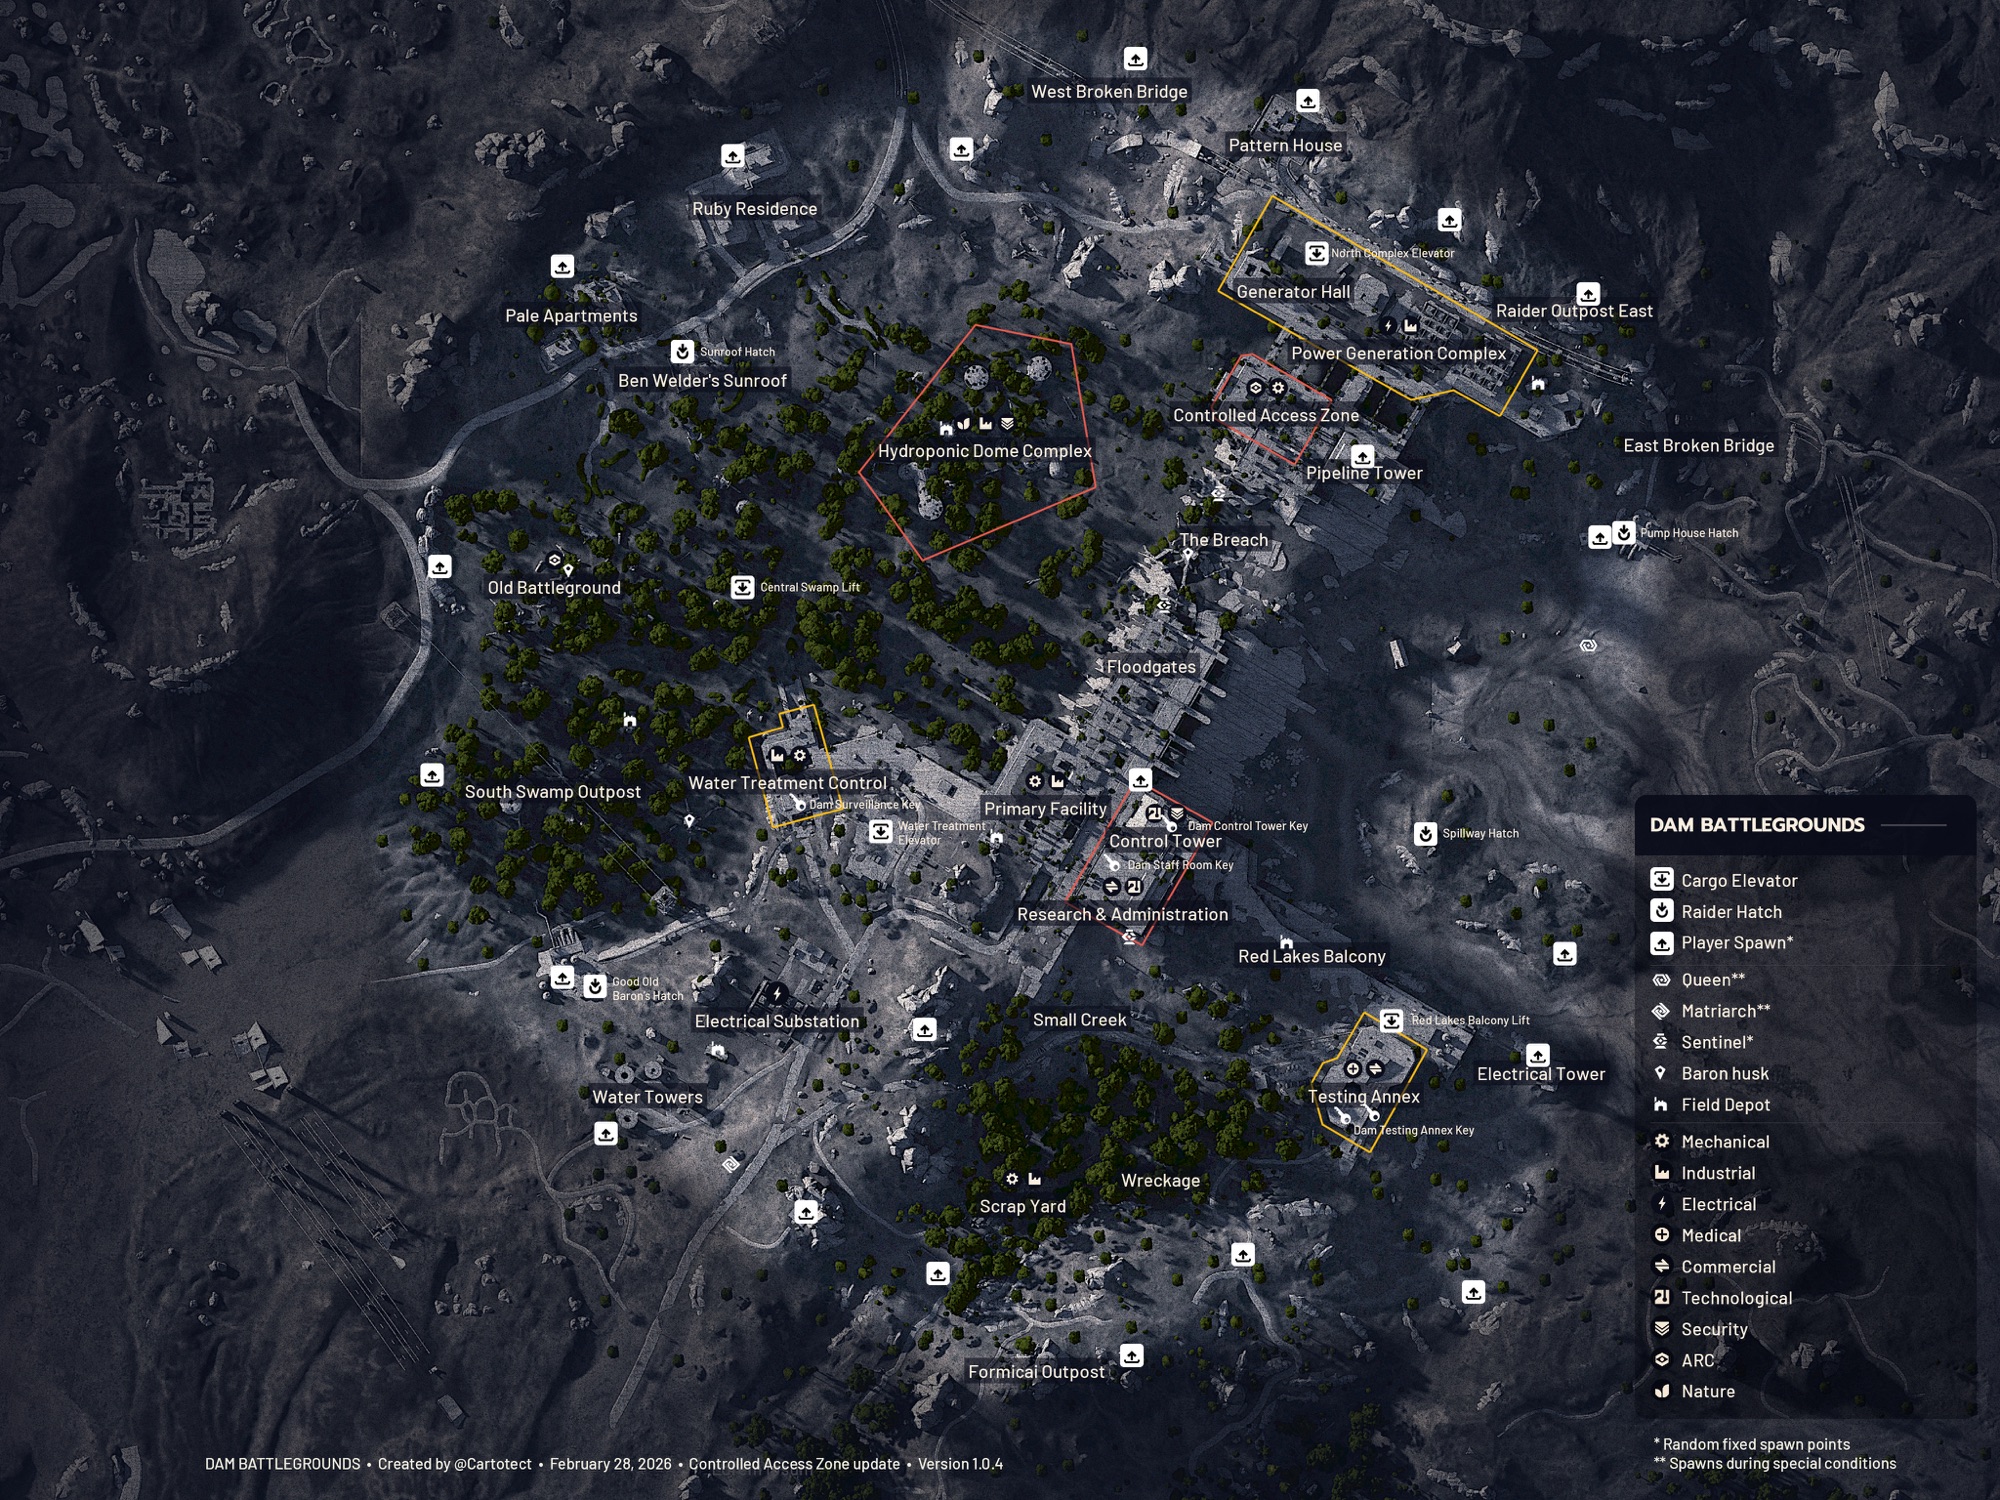
"The old dam has stood abandoned for decades — a monument from a bygone era. Now it serves as a battleground for raiders and ARCs alike. The winding structure offers countless hiding spots, but also deadly chokepoints. Watch out for the Resource Lock in the basement."
🧩 Dam Puzzle: Resource Lock
Inside the dam there's a hidden resource room (Resource Lock) that can only be accessed by solving a puzzle:
- Find a Fuel Cell on the map — it spawns randomly near the dam
- Bring the Fuel Cell to the generator station inside the dam and insert it
- Activate all 4 switches in the correct order — they're located on different levels of the dam
- Once all 4 switches are activated, the door to the Resource Lock Room opens
- Inside the vault you'll find high-value loot crates with rare materials and blueprints
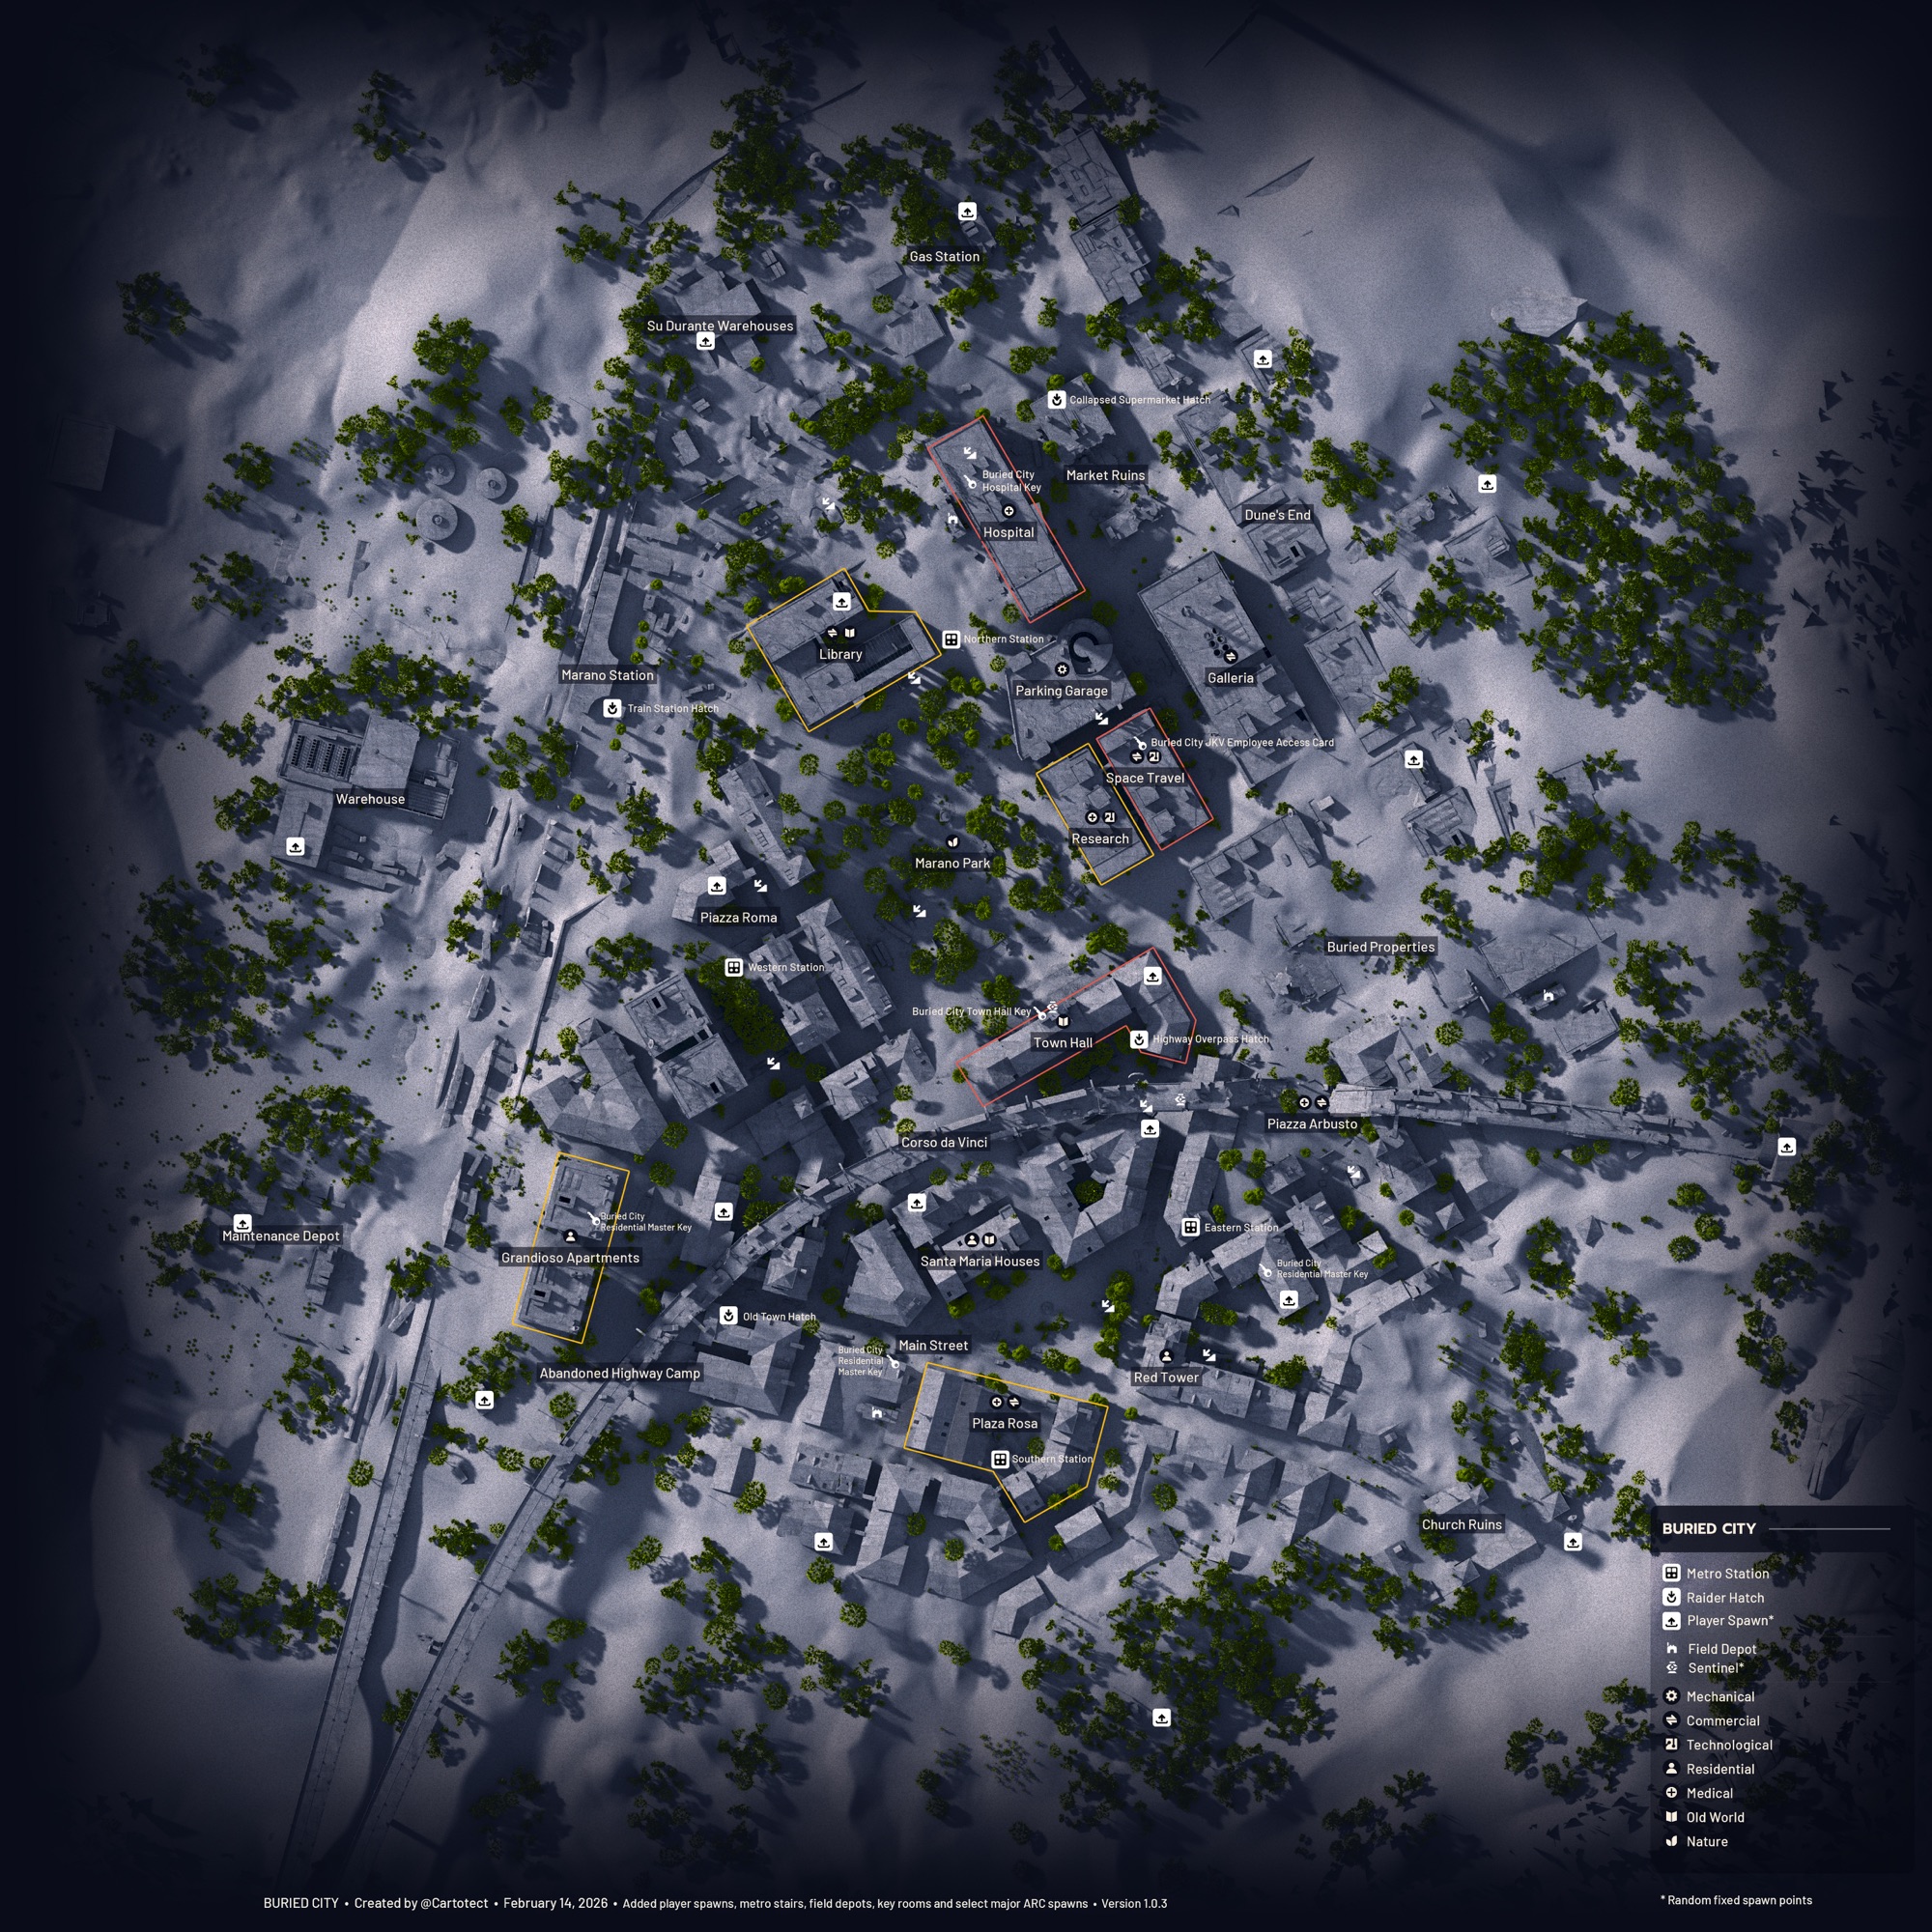
"Once a thriving metropolis, now buried under layers of rubble and vegetation. The ruins offer plenty of loot, but the narrow alleys and collapsed buildings make every fight a nerve-wracking experience. Experienced raiders value the many vertical levels for tactical advantages."
Surface
Underground
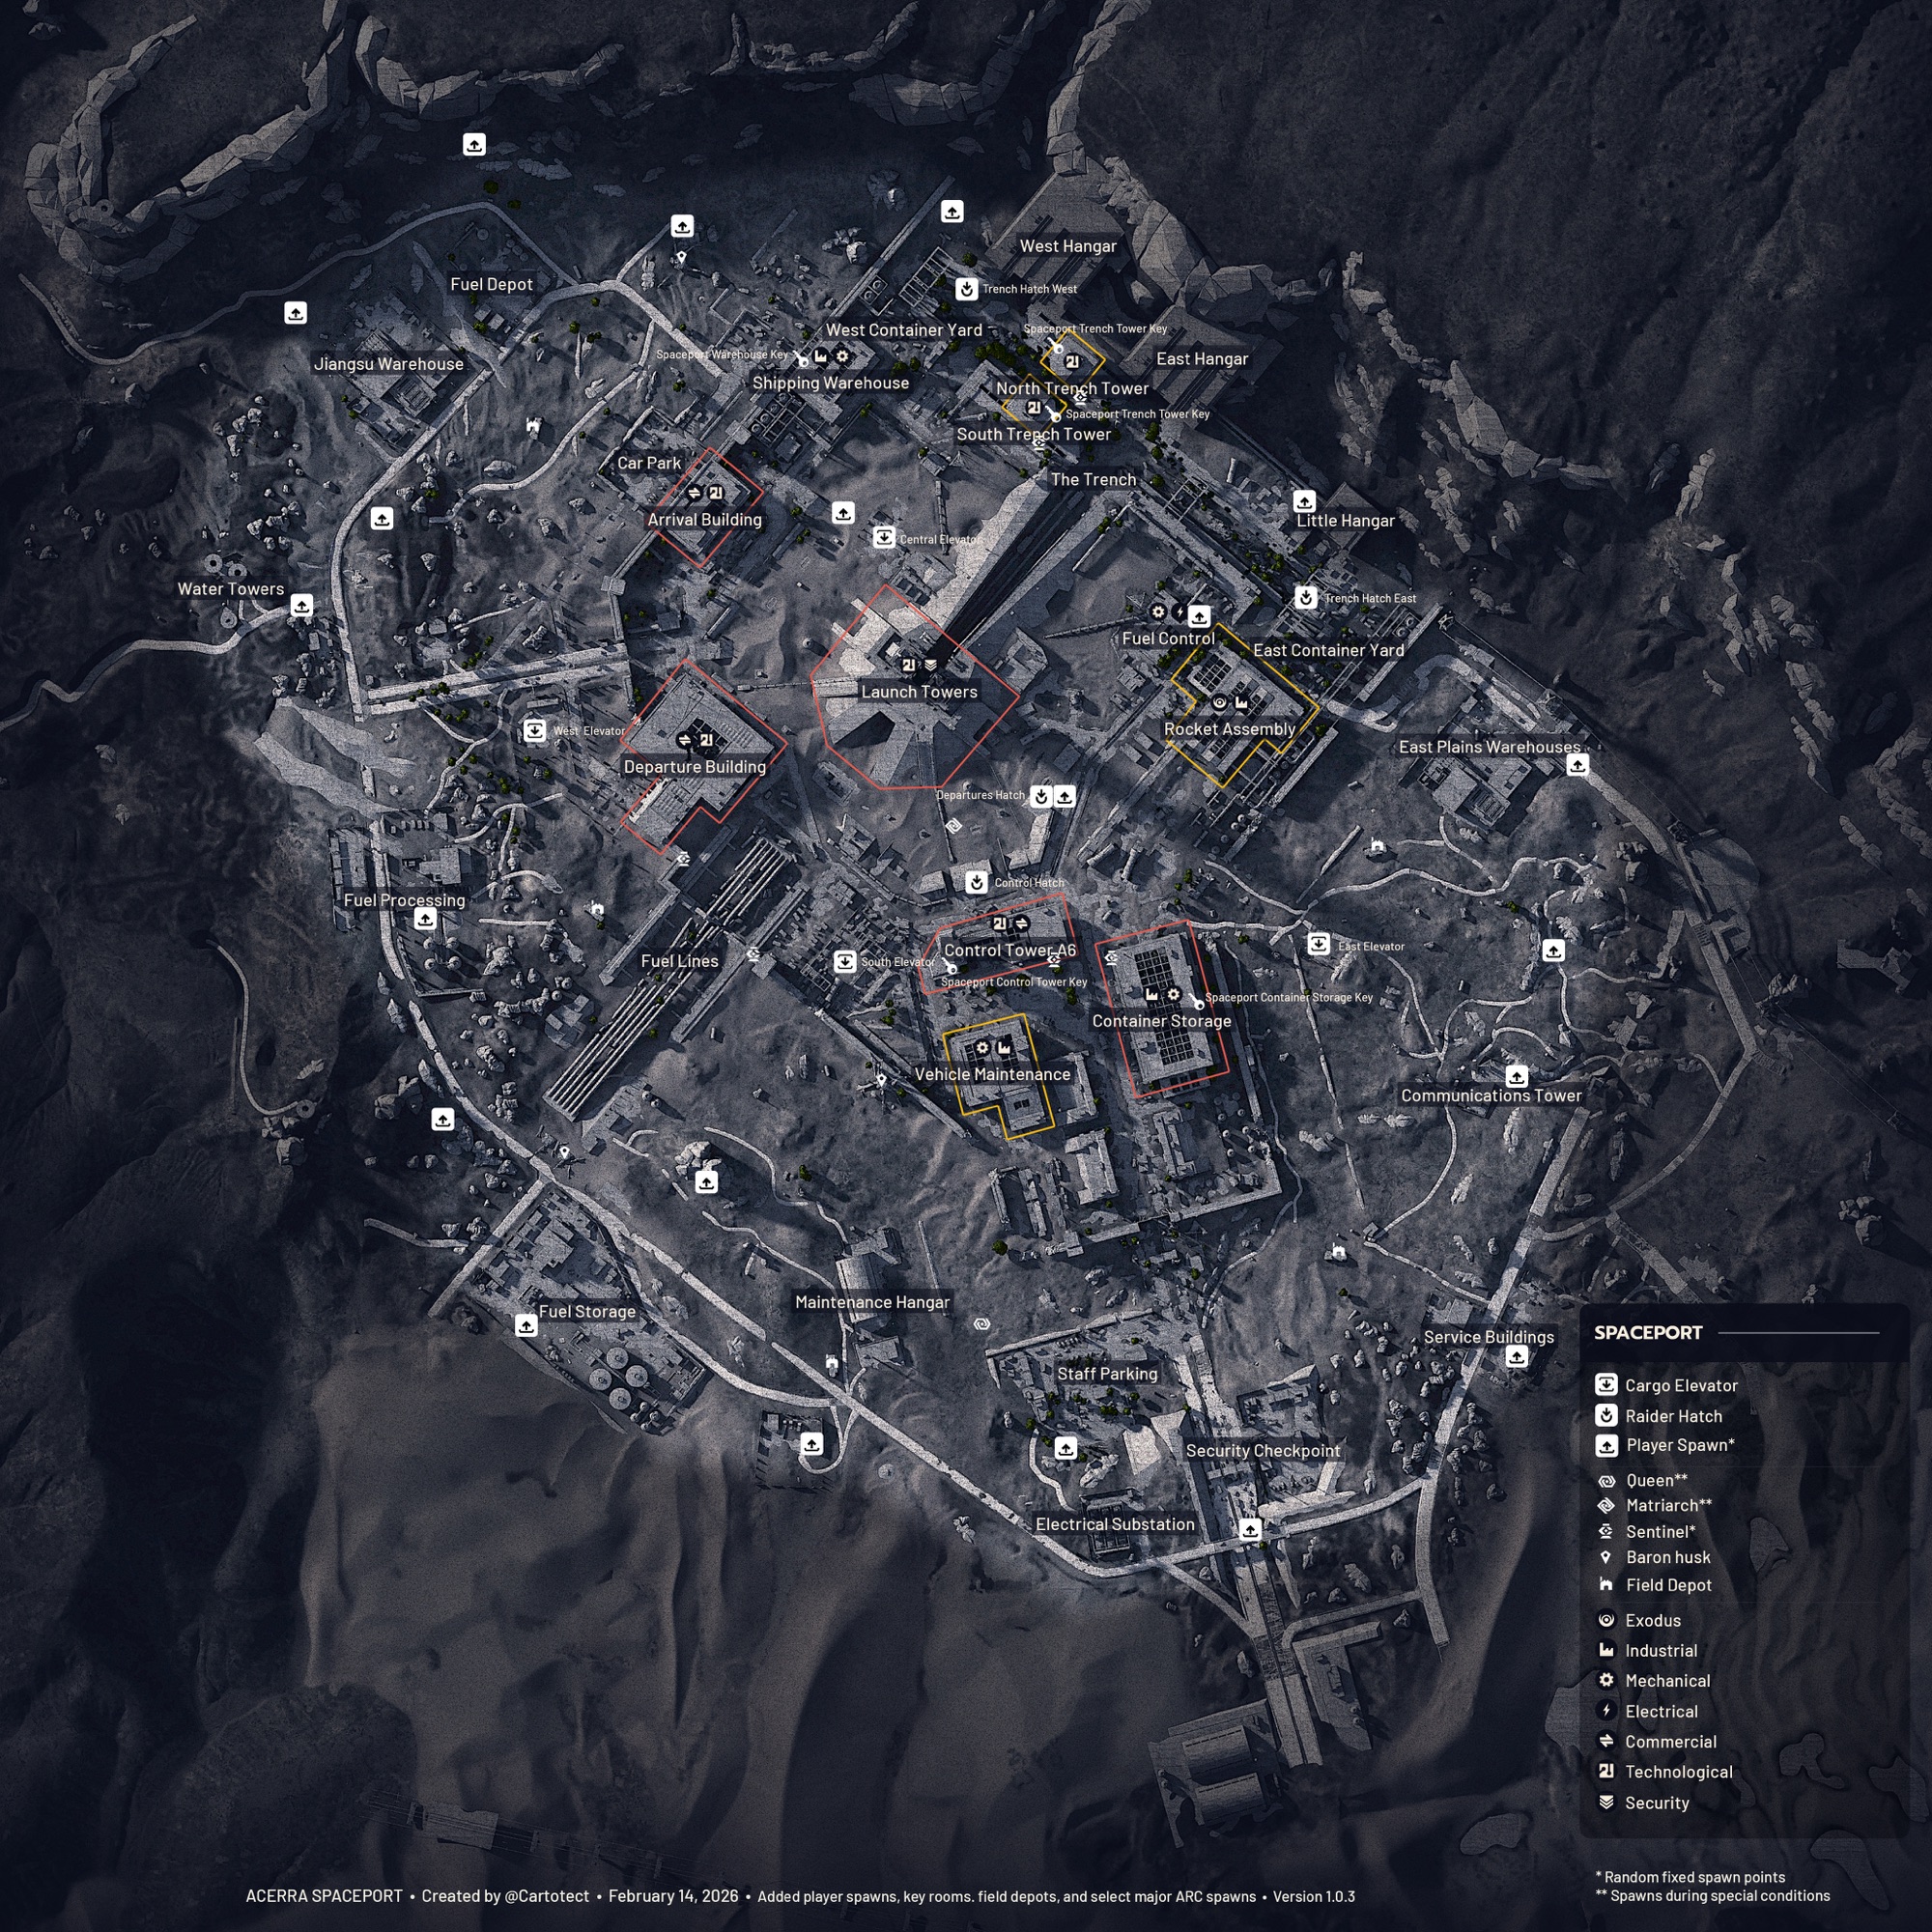
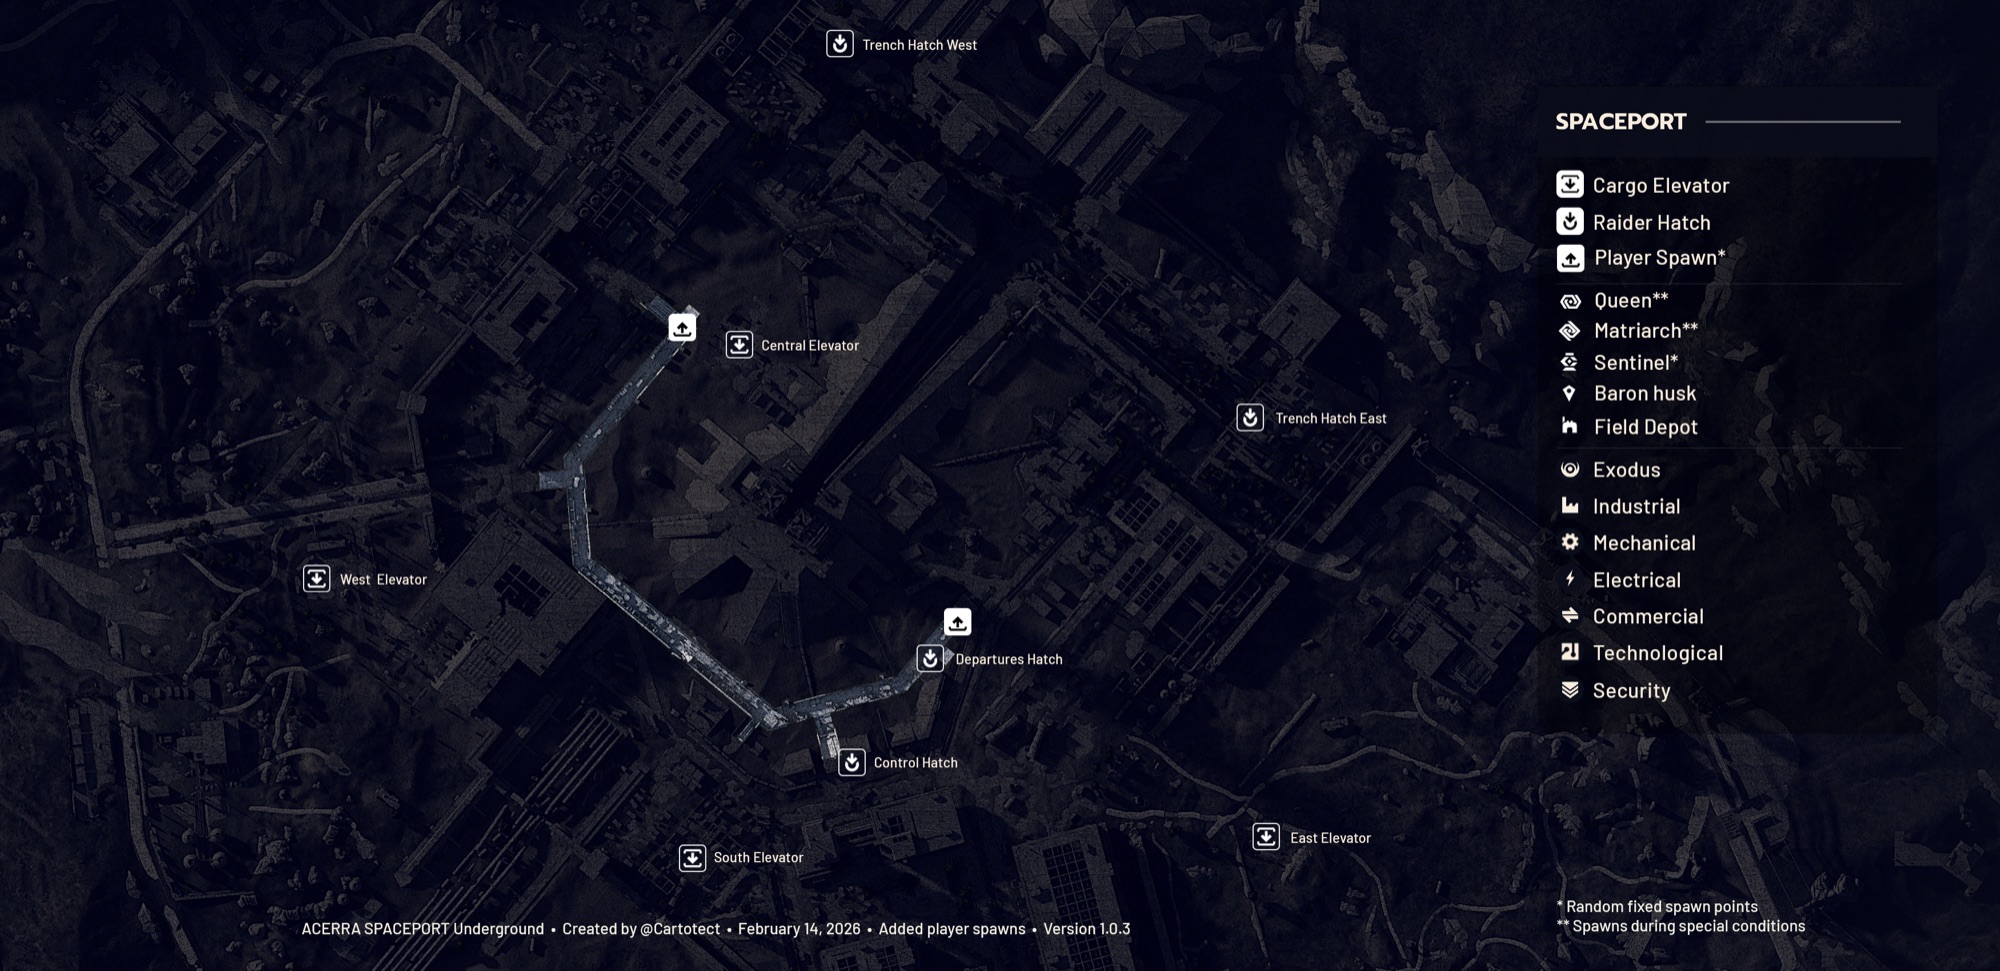
"The abandoned spaceport was once the gateway to the stars. Now it's a labyrinth of hangars, launch pads, and control rooms. The open runways offer little cover, but valuable tech loot awaits in the hangars. The ARCs have a strong presence here — watch out for patrols."

Surface
Underground
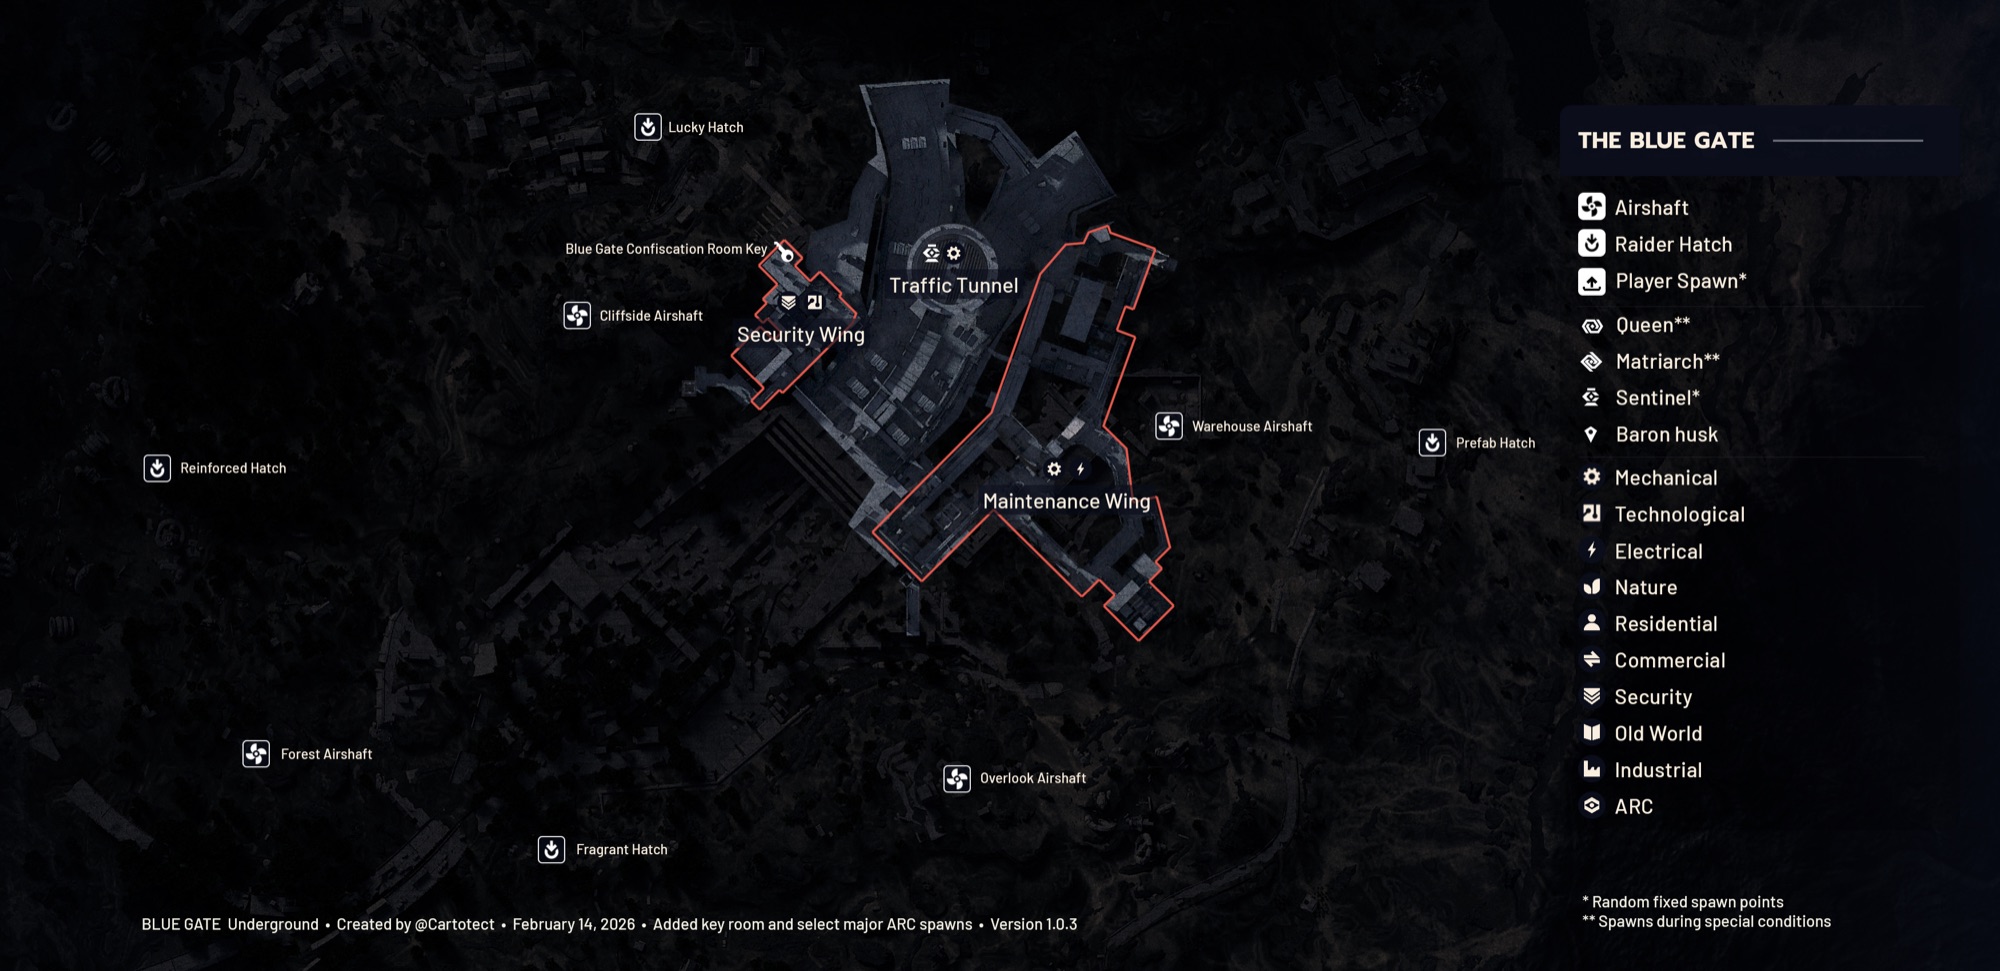
"The Blue Gate — nobody knows exactly what it once was. A research facility? A military complex? The mysterious blue energy pulsing through the facility attracts raiders and ARCs alike. Here you'll find the rarest materials, but also the most dangerous enemies. Recommended for experienced squads only."
Upper Level
Lower Level
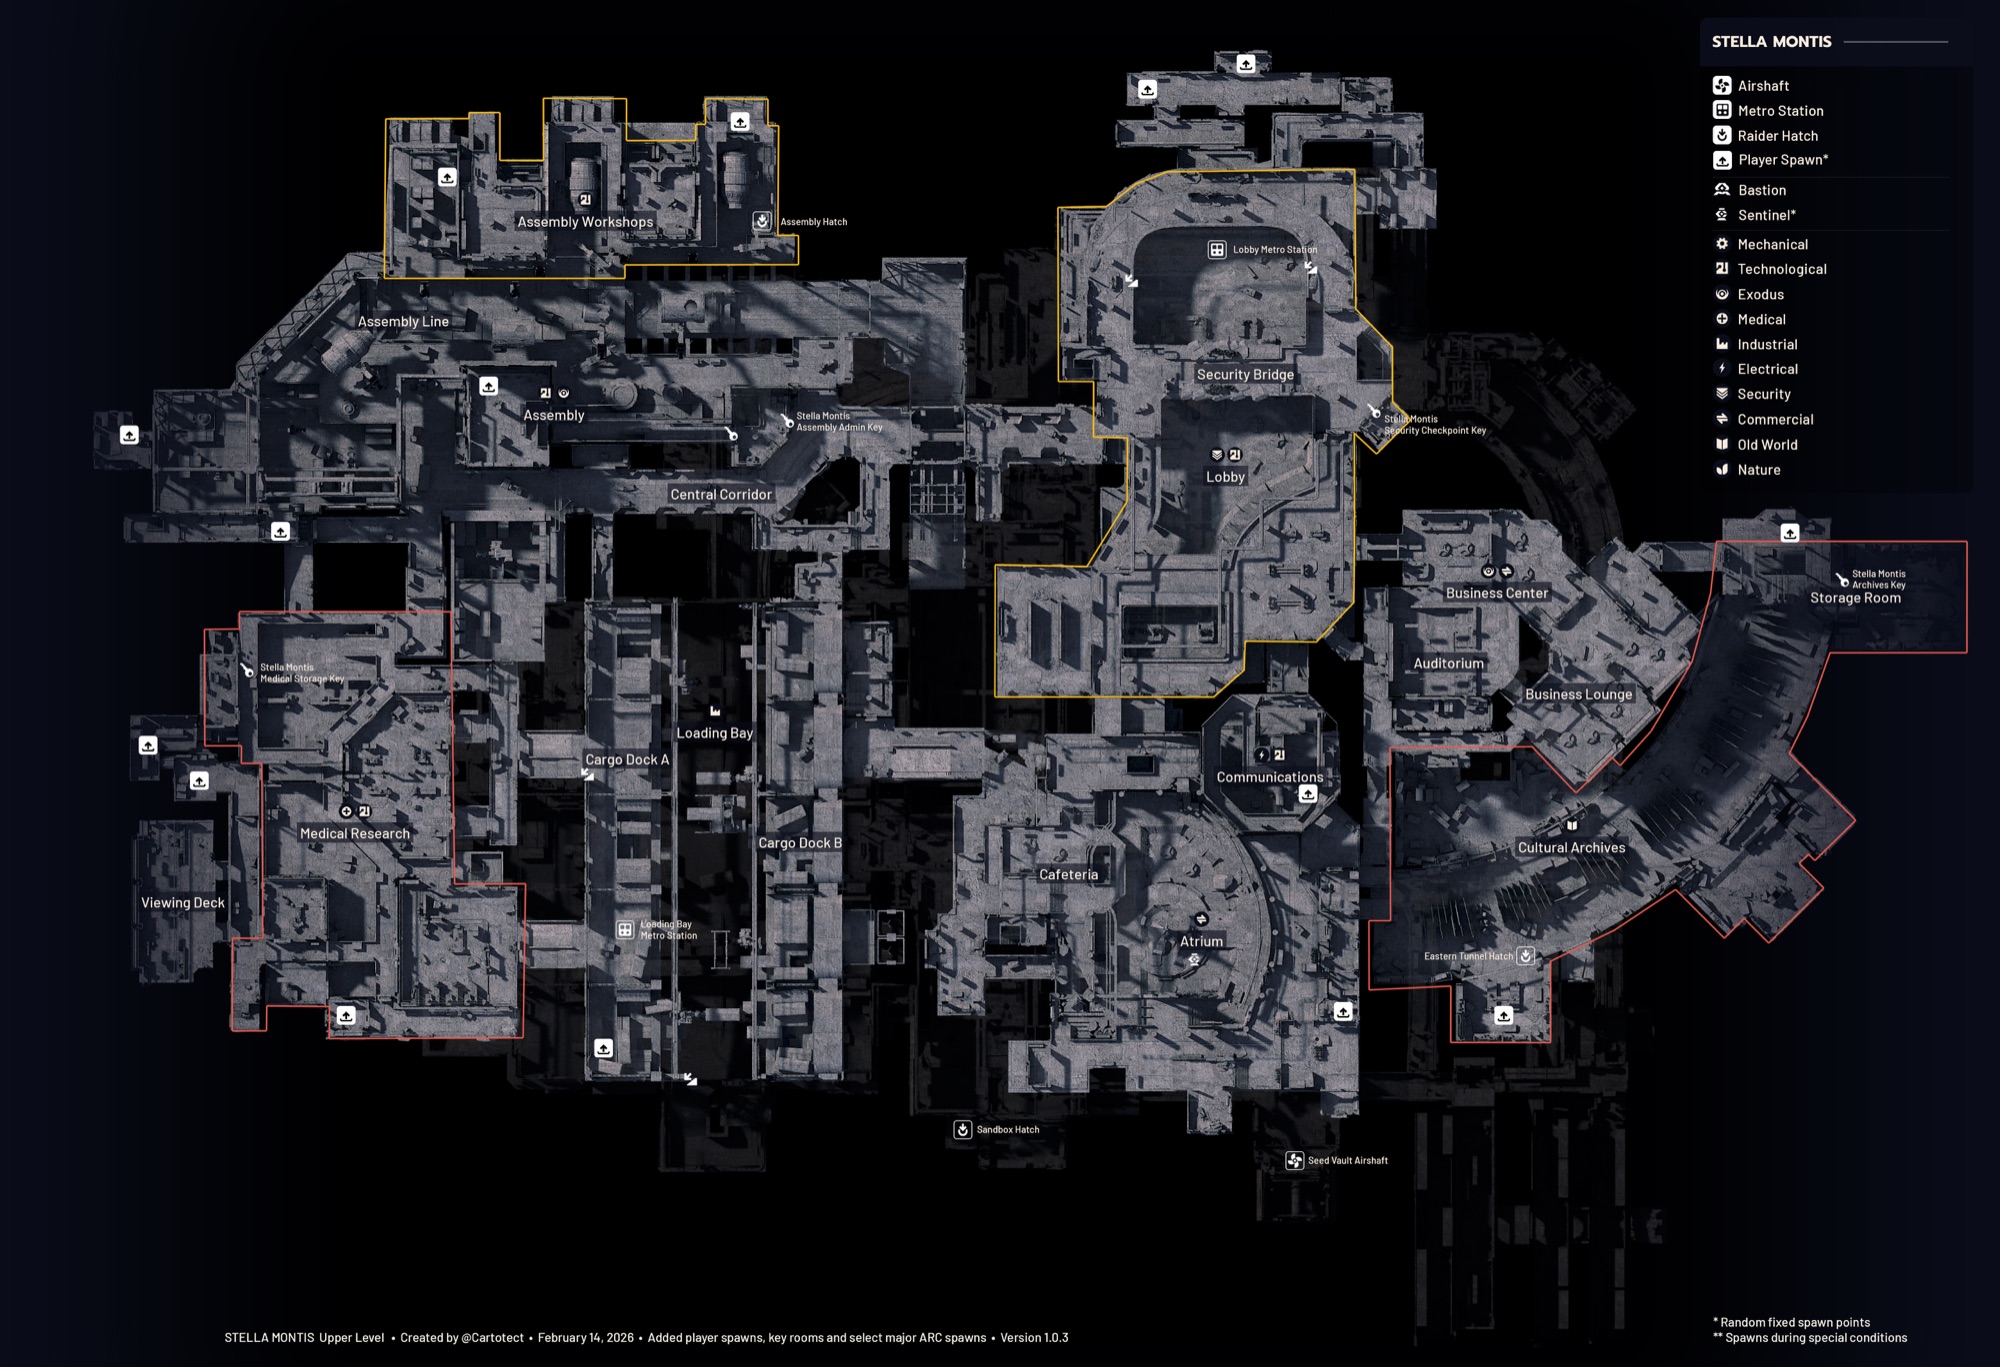
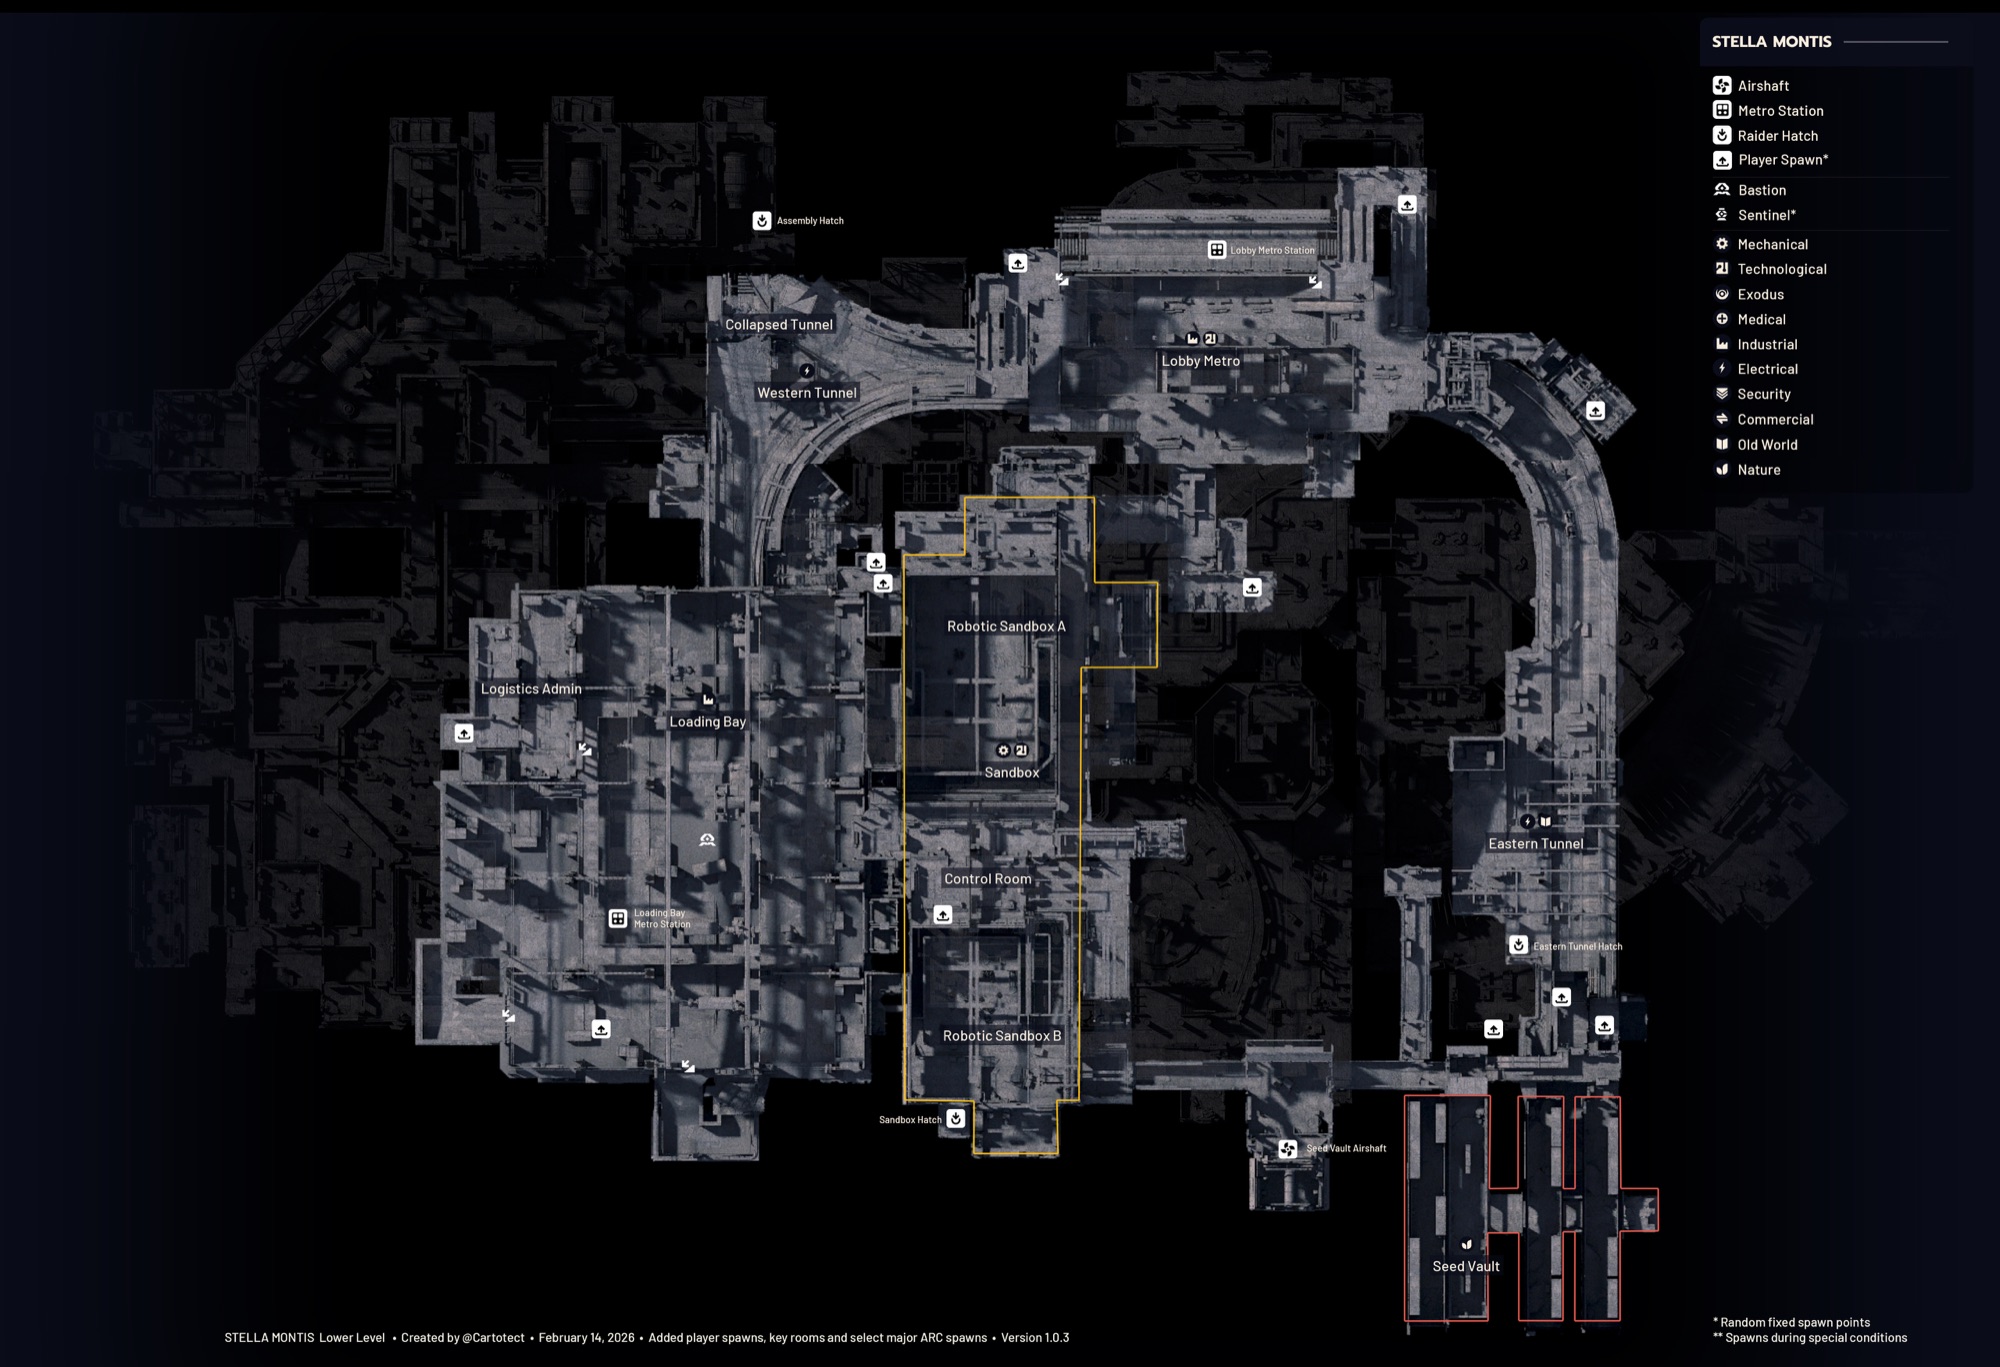
"Stella Montis, the Star Mountain — the ultimate challenge for every raider. On the summit and in the caves of this imposing mountain landscape, the most valuable treasures and deadliest enemies await. The high altitude makes navigation difficult, and sudden weather changes can turn a raid into a catastrophe in seconds. This is where the wheat is separated from the chaff."
"The Practice Range — a safe place to test weapons, shield setups, and movement mechanics. Here you can practice for 2 hours without any risk. Perfect for trying out new weapon builds or learning the controls."
Game Modifiers
⚡ Map Conditions
📊 Difficulty Levels
Each condition has a difficulty rating from 1 to 5. Trial conditions (level 4+) offer particularly valuable rewards but are extremely dangerous. Difficulty is shown by orange pips.
☀️ Normal
Standard conditions with no special modifiers. The entry point for every map.
Standard
📦 Uncovered Caches
Hidden loot crates appear across the map. More loot opportunities, but also more competition from other raiders.
Level 2/5
📡 Prospecting Probes
Special probes scan the area and mark valuable resources. Activate them for bonus loot — but they also attract ARCs.
Level 3/5
🤖 Harvester
A massive ARC Harvester roams the map collecting resources. Destroy it for enormous loot, but prepare for a tough fight.
Level 3/5
💀 Husk Graveyard
The map is littered with destroyed ARC Husks. Scavenge them for valuable tech parts — but careful, some aren't fully deactivated.
Level 3/5
👑 Matriarch
An extremely powerful boss ARC, the Matriarch, appears on the map. Defeat her for legendary loot. Squad coordination is essential.
Level 4/5
⚡ Electromagnetic Storm
Electromagnetic storms disrupt electronics and shields. Your shield regenerates slower, and sensors become unreliable. Yields rare materials.
⚡ Trial
🌙 Night Raid
Total darkness. Limited visibility, increased ARC patrols, but also the most valuable loot spawns. Flashlight and teamwork are mandatory.
⚡ Trial
❄️ Cold Snap
Extreme cold. Your character slowly loses HP when not near a heat source. Stamina regeneration is reduced. Warming items recommended.
⚡ Trial
🌪️ Hurricane
Maximum difficulty! Extreme winds affect projectile trajectories, visibility is minimal, and the strongest ARCs spawn. Elite squads only. Guaranteed rare loot.
⚡ Trial — Max. Difficulty
🎯 Map Tips for Raiders
- Beginners: Start with Dam Battlegrounds under Normal conditions — learn the basics
- Loot focus: Buried City + Uncovered Caches = best loot-to-risk ratio
- PvP action: Spaceport and Blue Gate have the most player encounters
- Endgame: Stella Montis + Hurricane Trial = best loot in the game, but extreme risk
- Dam Puzzle: Learn the switch positions — the Resource Lock Room is always worth it!
- Trials: Bring at least medium armor + Sterilized Bandages
- Practice Range: Use the 2 hours to test new weapons before risking them in a raid